

Fundamental Work
1. Well developed air column is at the core of clarinet basics.
- Draw in the air slowly and expansively, through the mouth only, as a balloon fills with air.
- Open passageway.
- Think low “whoo….” in order to draw air to lower lungs and downward to avoid wispy, chest and lung breath.
- For practice, use a metronome at quarter=60 and draw in air for 4-6 counts and then send out across the room. Repeat by taking 4-6 counts in and sending out in 2-3 counts.
- One visual for air speed is a path of a paper airplane.
2. Embouchure shapes the air column.
- “Outer” embouchure created by bringing lips forward and keeping rounded, like whistling, and then bringing 1-2/3 of the bottom lip over bottom teeth.
- Lip and area below the lip should be stretched and pulled downward, creating a flat, firm, and pointed chin. This formulation should result in a slight overbite.
- Bottom lip should serve as a bed or resting place for the reed, top teeth should rest on top of the mouthpiece, while the lips seal and close around the top and corners. Lips should supply even support around the mouthpiece.
- Some practice techniques include “milk-shake” embouchure, and pushing up and angling into the body, for less mouthpiece on top (for proper top teeth-bottom lip relationship), which results in better control of sound, and double-lipped (top lip tucked under) for practice in focusing the lips.
- “Inner” embouchure is also known as voicing- high, forward tongue inside the mouth. Think “eee.”
- Aim air towards ridge formed by upper palate just beyond the top teeth to generate the trajectory of airstream over a high tongue, small, rounded lip formation, overbite and down through a clarinet position that is angled toward the body, so that the air is directed down towards the floor.
3. Throat should stay relaxed.
- Throat should remain relaxed and in place, as natural as at rest, without opening too much, or with any type of placement or “feel.” Anything “felt” is tension.
- Large leaps to upper register, and upper register in general, could be aided by a slightly wider, lower, open throat position.
POWER IS IN BREATH (fuel of the sound), FLEXIBILITY IS IN THROAT, AND CONTROL IS IN VOICING AND EMBOUCHURE. Take a big breath, keep the throat relaxed, and direct tongue high and forward (up towards the ceiling.)
4. Articulation.
- Keep air and sound moving forward. Do not stop air between articulations.
- Begin sounds with tongue on the reed and air behind the tongue.
- Use just the tip of the tongue, already in a high and forward position.
- Lightly touch- light pressure. We tend to over articulate, and approach tip of reed from too low of a tongue position. Jaw motion indicates too much tongue motion.
- Articulate as you would speak. Articulation is just speaking through the reed.
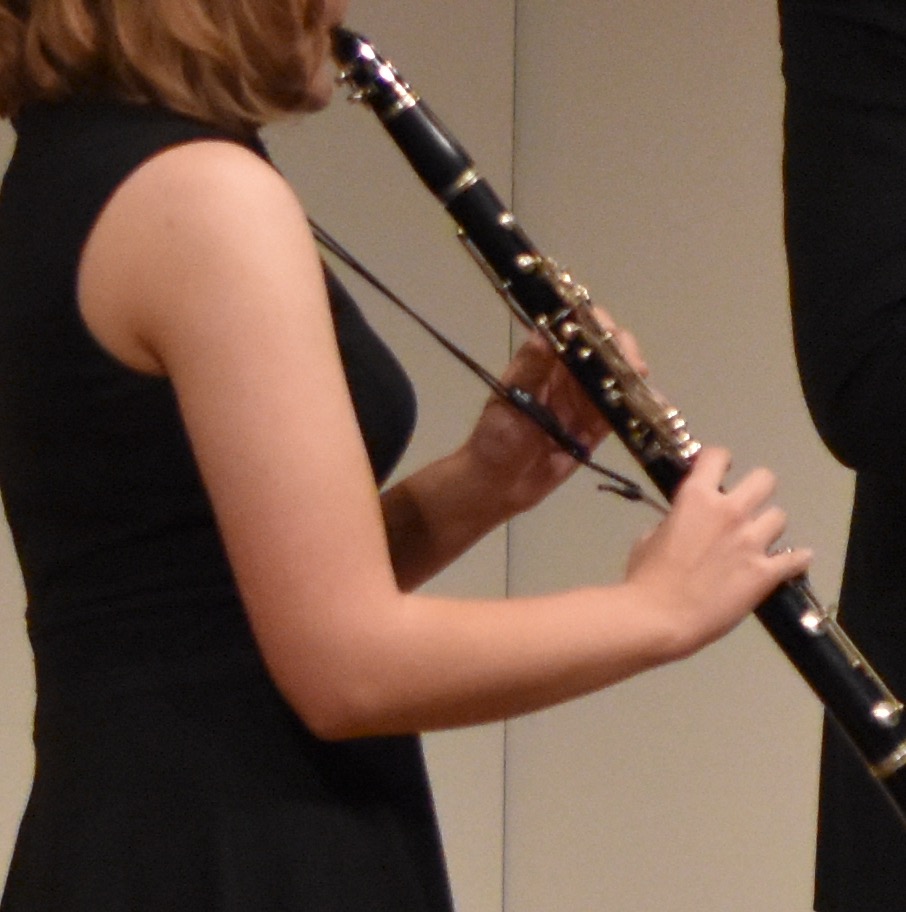
5. Hand position.
- Hang arms to the side and let hands dangle naturally. Notice curve.
- Bring up to the instrument, maintaining curve and direct line from elbow to fingers.
- Center of fingers, just beneath fingertips should find the center of tone holes. Overshooting fingers past tone holes, or too much of tips on top of tone holes, results in lack of coverage over tone holes and air escaping, and instrument not sounding.
- Keep curved and relaxed, at a slight angle, and with fluid release from tone holes and keys for an effective legato. Think “phrased finger.”
- Minimize distance from keys. Upon return to keys, utilize “re-coil fingers,” which is a slight lift of the fingers before coming back to the keys and tone holes.
6. Equipment.
- Keys bend, pads fall out, posts fall out of alignment. These can be the root of many problems on the instrument.
- Many good plastic and intermediate instruments on the market. Most important to have an instrument that functions well at first. A student can move to a more advanced instrument (i.e. Buffet B-12, or E-ll) after some time and developing some basic skills.
- Young students should begin on a 1.5-2.5 strength reed, for ease of production.
- After some time, a shift to a 3-3.5 strength would be helpful as the embouchure develops and strengthens. That would help projection and pitch.
- Softer reeds are best on a more open mouthpiece (i.e. Van Doren B40, B45); harder reeds on a more closed mouthpiece (Van Doren M13 Lyre or M15).
7. Introductory Sources.
A. Studies and Books:
First Book of Practical Studies, Nilo Hovey
Melodious and Progressive Studies, Book I, David Hite
Clarinet Student, Volumes I-III, Robert Lowry and James Ployhar
Tunes for Clarinet Technic, Fred Weber and Robert Lowry
Studies and Melodious Etudes, Robert Lowry and James Ployhar
Clarinet Student, Volumes I-III, Jack Snavely
Hendrickson Method for Clarinet, Clarence Hendrickson
Modern Course for Clarinet, Volumes I-IV, James Collis
Rhythmic Training, Robert Starer
Pares Scales, by Gabriel Pares, edited Harvey Whistler
Celebrated Method for Clarinet, Hyacinthe Klose
Embouchure Building for Clarinetists, Larry Guy
B. Collections
Concert and Contest Collections, ed. by Himie Voxman
40 Etudes and 32 Etudes, Cyrille Rose
#teaching
George Stoffan
George Stoffan holds DMA from the University of Wisconsin-Madison in Clarinet Performance. He teaches at Oakland University in Rochester, MI. Stoffan is currently Principal Clarinetist of the Oakland Symphony Orchestra. He was previously Principal Clarinetist and Concertmaster of the United States Air Force Band in Washington D.C.
Comments are closed.